-
Click Start Menu
- Point to Programs/AllPrograms
- Point to Microsoft Office
- Click Microsoft Power Point
- or
- Press 'Windows Key' from Keyboard
- Press 'R' from Keyboard
- Type PowerPoint
- Press 'Enter' from Keyboard
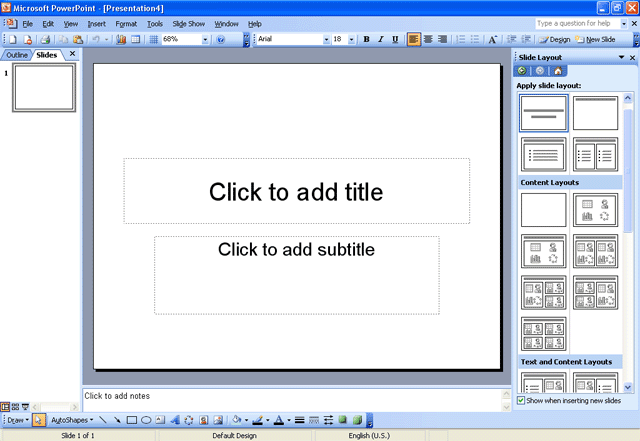
After run Power Point we will get below layout window. To write on the Slide we have to click into ‘Click to add title’ text box. Then type text.
| To Create Simple Presentation: |
|
Think you like to create a presentation about Computer. Ok, let’s start create a sample presentation about Computer.
- Click into ‘Click to add title’ Text Box
- Type Computer
- Click into ‘Click to add Subtitle’ Text Box
- Type Automatic Problem Solving Machine

-
Click Insert Menu
- Click New Slide
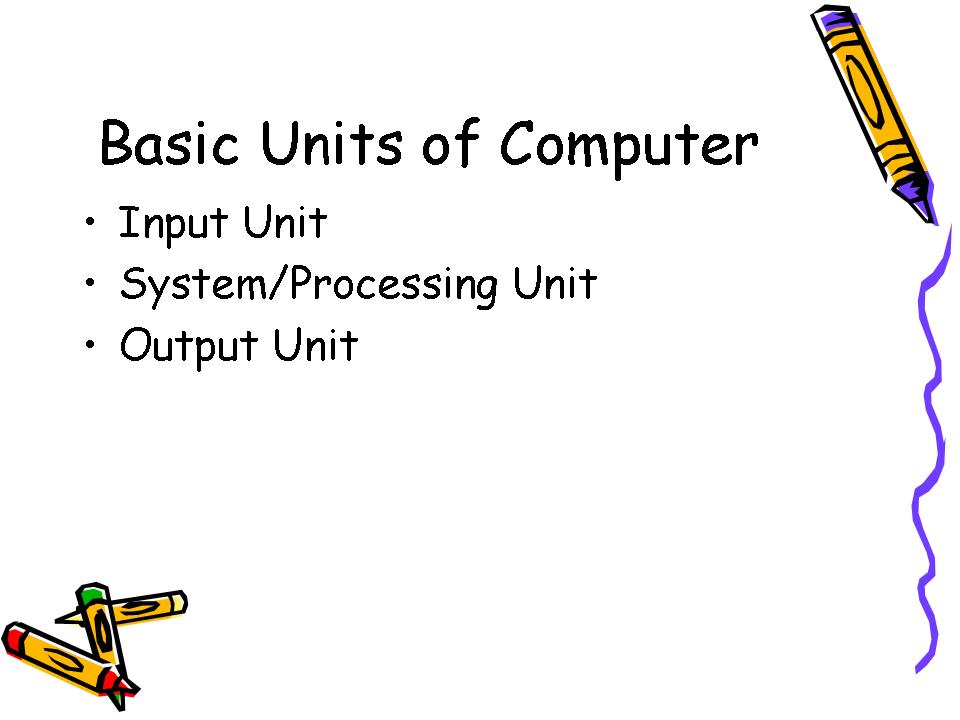
- Click into ‘Click to add title’ Text Box
- Type Basic Unit of Computer
- Click ‘Click to add text’
- Type Input Unit [Enter from Keyboard] System or Processing Unit [Enter] Output Unit
-
Click Insert Menu
- Click New Slide
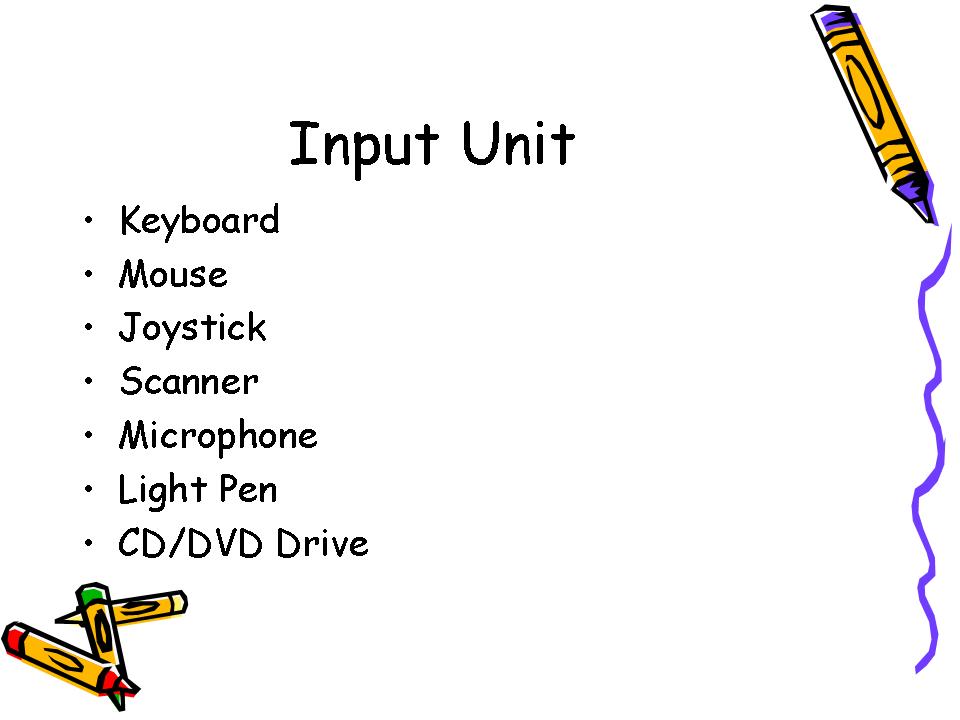
- Click into ‘Click to add title’ Text Box
- Type Input Unit
- Click ‘Click to add text’
- Type Keyboard [Enter] Mouse [Enter] Joystick [Enter] Scanner [Enter] Microphone [Enter] Light Pen [Enter] CD/DVD Drive
-
Click Insert Menu
- Click New Slide
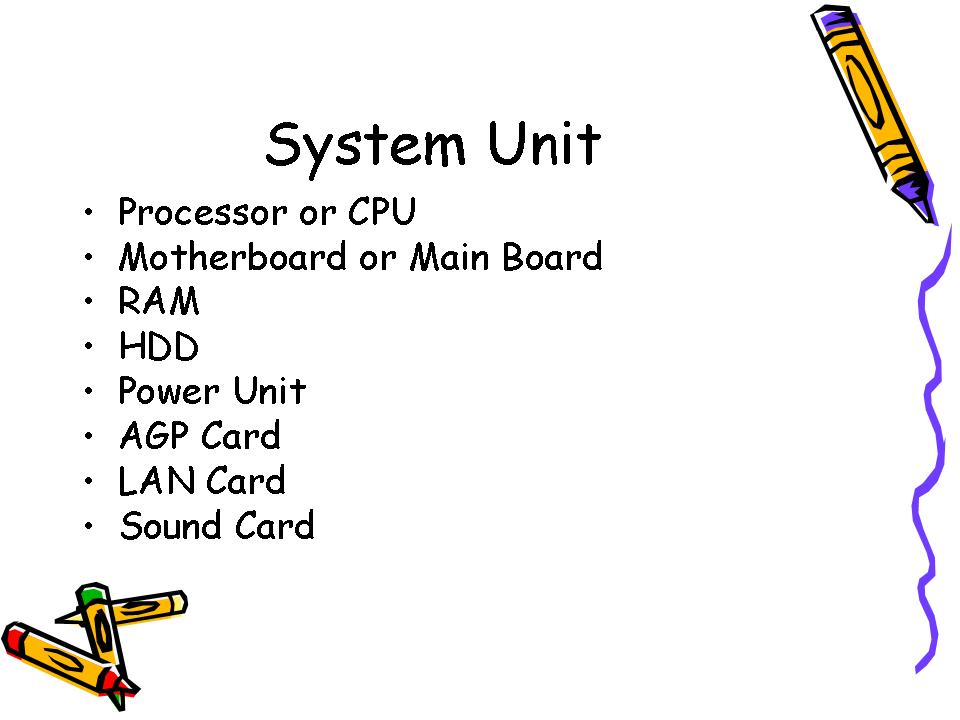
- Click into ‘Click to add title’ Text Box
- Type System Unit
- Click ‘Click to add text’
- Type Processor or CPU [Enter] Motherboard [Enter] RAM [Enter] HDD [Enter] Power Unit [Enter] AGP Card [Enter] LAN Card [Enter] Sound Card
-
Click Insert Menu
- Click New Slide
- Click into ‘Click to add title’ Text Box
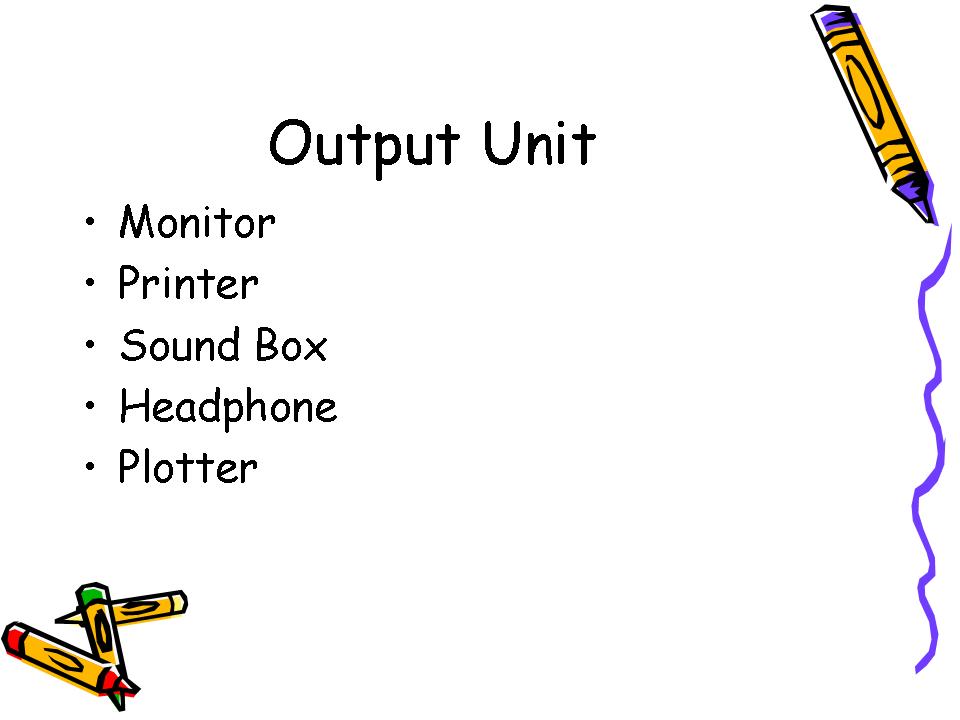
- Type Output Unit
- Click ‘Click to add text’
- Type Monitor [Enter] Printer [Enter] Sound Box [Enter] Plotter [Enter] Headphone
-
Click Format Menu
- Click Slide Design
- Click/Choose a Design from Slide Design Window which is appear in Task Pane
- Click View Menu or Slide Show Menu
- Click Slide Show or View Show
- Press ‘Enter’ from Keyboard for Next Slide
- Press ‘Esc’ from Keyboard for Exit Slide Show
Save: Saves the active files with its current file name, location and file format.
- After Create Presentation
- Click File Menu
- Click Save
- Select Location from ‘Save in’ box
- Type File Name into ‘File name’ box
- Click Save or OK
- or
- After Create Presentation
- Press 'Ctrl + S' from Keyboard
- Select Location from ‘Save in’ box
- Type File Name into ‘File name’ box
- Press 'Enter' from Keyboard
Save as: Saves the active file with a different file name, location or file format. We can also use this command to save a file with a password or to protect a file so that others cannot change its contents.
- After Save Presentation
- Click File Menu
- Click Save As
- Select Location from ‘Save in’ box
- Type File Name into ‘File name’ box
- Click Save
- or
- After Save Presentation
- Press 'F12' from Keyboard
- Select Location from ‘Save in’ box
- Type File Name into ‘File name’ box
- Press 'Enter' from Keyboard
Save as Web page: Saves the file in HTML format (a Web page) so that it can be viewed in a web browser and sets other options such as the Web page title and location where the file will be saved
- Click File menu
- Click Save as Web page…
- Select Location from ‘Save in’ box
- Type File Name into ‘File name’ box
- Click Save
| To Open New Presentation/File: |
|
- Click File Menu
- Click New
- Click ‘Blank Presentation’ from Task Pane (for Task Pane, look right side of Power Point layout)
- or
- Press 'Ctrl + N' from Keyboard
- Click File Menu
- Click Page Setup
- Click 'Slide sized for' arrow
- Select a Slide/Page Size as A4
- or Change Width and Height as you Choice
- Select Slides Orientation Portrait or Landscape
- Click OK
| To Open an Existing Presentation/File: |
|
- Click File menu
- Click Open
- Select Location from ‘Look in’ box
- Select a Presentation/File
- Click Open
- or
- Press 'Ctrl + O' from Keyboard
| To Close a Presentation/File: |
|
- Click File menu
- Click Close
- or
- Press 'Ctrl + W' from Keyboard
Print Preview: Print Preview shows how a file will look when we print it.
- After Open or Create a Presentation
- Click File menu
- Click Print preview
- or
- After Open or Create a Presentation
- Press 'Ctrl + F2' from Keyboard
-
Click File Menu
- Click Print
- or
- Press 'Ctrl + P' from Keyboard
- To Print all Slides:
- Select ‘All’ option/radio button (by default All is selected)
- To Print Current Slide:
- Select 'Current slide' option/radio button (current slide means that slide is selected)
- To Print Selection:
- Select Some Text of a Slide
- Open Print
- Select 'Selection' option/radio button
- To Print Slides as you choice:
- Select 'Slides' option/radio button
- Type Slide Number as 5,10-15,20,22-25 into ‘Slides: box’
- Click Ok
- To Print Number of Copy of a or Slides:
- Select 'All' or 'Current slide' or 'Slides' or 'Selection
- Set Number (how many copy you like to as 5) from 'Number of copies' list box
- To Print with Color or Grayscale:
- Click 'Color/Grayscale' down arrow
- Select Color for Colorful Print or Select Grayscale for Non Colorful Print
- Click OK
- Click File Menu
- Click Exit
- or
- Press 'Ctrl + F4' from Keyboard
- or
- Click 'Close Button' from Right Corner of Power Point Window
|

